Archive for the Category » Home Projects «

Friday, December 31st, 2010 | Author:

I’ve got a GE side by side fridge (model #GSH25KGMDWW) and we went away for about a week and half and when we came back the water dispenser was no longer working, but the ice maker was still working fine.  I’m not sure when exactly it stopped working, but this is the first time it has happened and we’ve had the fridge for about 5 years now.

So we ignored it for a while and after getting annoyed enough I looked for some answers out on the web and found a page that had a fix for it.  That’s great, but I thought I’d just show it in a more graphical way.

Step 1

Find a squeeze bottle of some sort.  I have some kitchen squeeze bottles I use all the time so I used one those, but the original poster reccomended a hershey’s chocolate syrup bottle (cleaned out of course).

Step 2

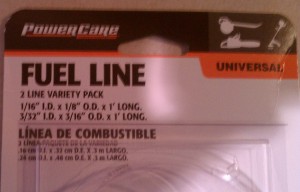
Buy a package of fuel lines from home depot (< $4) as shown in this picture:

Step 3

Put the small fuel line (outside diameter of 3/16″) into your squeeze bottle.  If it isn’t a tight fit into the nozzle just tape it up some.

Step 4

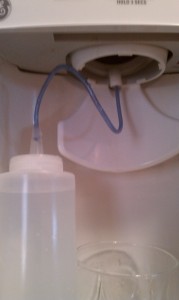
Put the other end of the hose into your water spout on the fridge and give it a squeeze and keep working it backwards as you go.   It only took maybe 10-15 seconds to get mine cleared.  Make sure to put a cup there to catch the water coming back out.

That should just about do it!  If you aren’t sure that you have a frozen blockage (there are other things that can break and cause the same issue of no water) simply insert some flexible thin object (I used some of the plastic string from my yard trimmer) and if you hit a blockage with that it is probably just a frozen spot in the line.

Saturday, July 25th, 2009 | Author:

Okay… I found a new site that I’m pretty interested in:  Instructables.   Basically people come up with ideas and provide some detailed instructions on how to make something.  They’ve got a pretty wide variety of stuff though.   Some really kooky stuff sometimes, but a lot of actually interesting things for people that like a little DIY.

Instructions on everything from food to home projects, to garden projects, etc…  take a look around or keep an eye on their RSS feed just to see what is being posted…

So this one caught my eye… Hungarian Shelves.  What a cool idea.  Basically I would put a vertical board on every stud across a whole wall, and then put shelves all the way across.  Some nice simple notching, no stupid “L” brackets, etc…  What a good idea!  That is if you have a ton of books I guess.

I have an issue with book shelves… I never have enough of them.   I put up what I thought at the time was a ton of shelves… by the time I got my existing books onto the shelves I was already out space and the books have already overflowed into a cheap 2 shelf bookcase (2 deep) and onto the ground in front of the shelves and the nightstand and dresser.  I like to read… a lot.

Here is the progression of my issue…

When we first moved in

When we first moved in

So then I got these cool sort of end brackets from ikea and made myself what I thought was a ton of space… turns out i just barely fit what I had!

Brand new shelves!  Look at all that empty space!  Oh.... wait...

Brand new shelves! Look at all that empty space! Oh.... wait...

And now I’ve gotten even more books so they are piling up by the bookcase

The cup runneth over...

The cup runneth over...

and into another small shelving unit

and over...

and over...

and onto my dresser (these are just my most recent ones that haven’t made it to the study yet)

and over!

and over!

So this doesn’t even include all of my wife’s books that are on two more 4′ high shelves in our closet…  I think the next house will have to have a whole lot more shelves for books.   Maybe I should just build a little library in our next house…

biltmore-library

Category: Home Projects  | Tags: , , ,  | Leave a Comment
Wednesday, December 03rd, 2008 | Author:

So my 1 year old decided to start playing with the air vents recently… I had never even thought about these vents before she got into them.  Essentially they were just held there by gravity so she could easily just lift them out and then throw stuff down that hole.  I think we lost a tennis ball somewhere into the HVAC system…  So I decided it was time to babyproof them… here are the steps with some pictures to help…

Tools & Supplies:

  1. Drill
  2. Assorted drill bits
  3. Vent Covers
  4. Screws
  5. Hot Glue Gun
  6. Countersink bit
  7. Screen Replacement Material

Instructions:

  1. Purchase some new vent covers (I had to do this step b/c my wife wanted new pretty vent covers… you can skip this one unless your wife also wants new pretty vent covers…)    Make sure that if you’re buying something that you get something sturdy.  I don’t think the all-plastic models would hold up well.  I ended up with the 4″x10″ covers from lowes.  The inside part is plastic but the whole top was solid metal which seemed fine to me.  
  2. Buy some replacement screen material something like this from Lowes works just fine.
  3. Buy the screws you want.  Now I wanted something that looked decent, but I couldn’t find anything at Lowes.  I went to a small hardware store down the road and found some antique black cabinetry screws with a square drive.  PERFECT!
  4. Depending on the screws you get you may also need a countersink bit for your drill (if you got a metal vent in step #1, make sure that the countersink bit you get works for metal too!)
  5. Fit the vent into the hole and decide where you need to drill so that you will hit the floorboard surrounding the vent.  Some of these vent holes look like they were cut with a chainsaw, so make sure that you’re going to be drilling into something.  I reccomend looking at each of the holes individually because the guy cutting them was not only using a chainsaw, but was also hammered.
  6. Decide on the placement and then drill a hole for the screw… pick you drill bit size very carefully.  WIth the screws I chose if I made the hole big enough for the thread then the head of the screw could almost slip through.  *BUT* the metal was too thick on the top of the vent to thread the screw through like you would normally…  The solution?   Countersink both sides of the hole so that it makes an hourglass shaped hole for the screw to easily thread throught but still allow the head to have good purchase.  
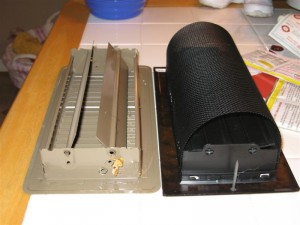
  7. Now cut a piece of the screen to fit the bottom part of the register.  You want to make this long enough so that it will loop over the slats when you open the vent.  Once you have this sized properly cut it out and just hot glue it in place.  (3 globs of glue on each side was good enough for me.)
  8. Let the glue set for a bit and then go drill the floor boards and screw them down!
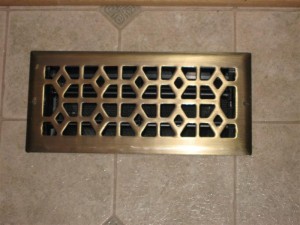
  9. Ta-Da!
Category: Home Projects  | 23 Comments